


When your website suddenly gets flagged as “Not Secure” by Google, and visitors see warning pop-ups during login or checkout, over 63% of users will leave immediately — that means losing traffic and crashing brand trust!
This article offers actionable fixes you can do yourself — no tech background needed. Get your site back to “secure” in under 2 hours!
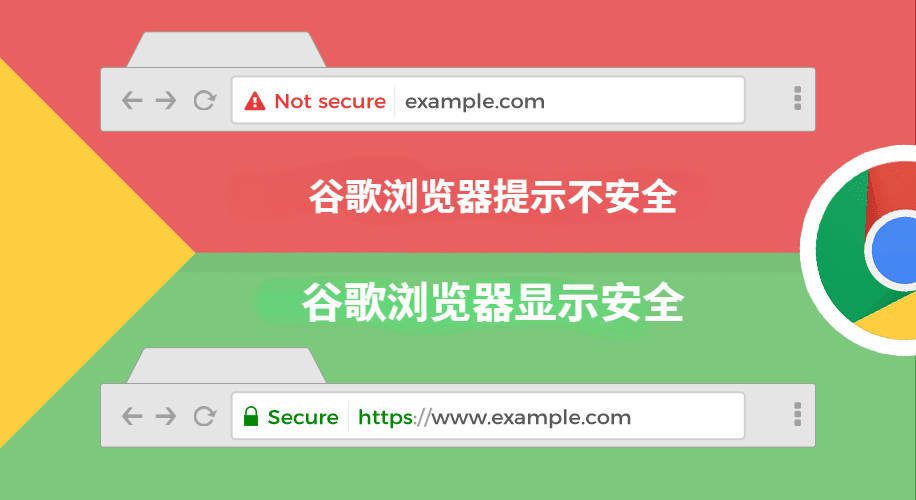
Why Your Website Gets Marked “Not Secure”
Since 2018, Google has required all pages that collect user input (like logins, payments, or forms) to use SSL certificates. If not, the page gets flagged as insecure.
What’s trickier is: even if you already have an SSL certificate, things like an expired certificate (free ones often expire every 3 months), a domain mismatch (www vs non-www), or using HTTP links for images or scripts (like ads from third parties) can still break HTTPS.
HTTP = “Naked” Data Transmission
An offline retail chain’s online store got hit by hackers because it didn’t have HTTPS. During the investigation, the tech team found out attackers used public WiFi and the Wireshark tool to capture over 200 plain-text passwords in just 5 minutes.
The real problems:
- With HTTP, all data (passwords, payments) is sent as plain text
- Pages without encryption are 3.6 times more likely to be tampered with (Source: 2024 Sucuri Security Report)
- Google drops search rankings for HTTP pages by 15%-20% (SEMrush data)
“Fatal Flaws” in SSL Certificates
During a big sale in 2023, a clothing website lost 370,000 yuan in orders because its SSL certificate expired — browsers blocked the payment page completely.
- Expired certificate: Free ones (like Let’s Encrypt) expire every 90 days. If not renewed, they stop working
- Domain mismatch: Your cert is for
domain.com, but users visitwww.domain.com— boom, warning triggered - Missing intermediate certificate: A big issue on Android devices — triggers a “certificate chain incomplete” error
Industry reality: Among websites that use HTTPS, 43% still have SSL config errors (SSL Labs 2024 data)
Mixed Content: One Bad Link Ruins Everything
A WordPress site owner said: “I already installed SSL, but it still shows as not secure!” Turns out, images in the theme were using HTTP links — that broke the whole page.
Common causes:
- Old posts with HTTP image links (e.g.,
http://image.com/1.jpg) - Third-party plugins calling non-HTTPS APIs (e.g., chat popups, ads)
- Hardcoded HTTP links in your database
How to check:
- In Chrome, press F12 → check the Console tab for specific error files
- Use SSL Checker to scan your cert setup
Hidden Threat: Regional Network Hijacking
Some local ISPs hijack HTTP traffic to insert ads or forced redirects. For example, users in Yunnan complained a company site was “auto-opening gambling ads” — turned out it was the ISP.
This kind of hijack triggers browser security alerts, making users think your site is shady. Complaints can spike by 280% (Source: Webmaster.cn case study)
How to Get a Free SSL Certificate (3 Easy Ways)
“Installing SSL means server headaches? Too expensive?” That’s the #1 myth that stops small site owners from fixing “Not Secure” warnings.
In fact, over 430 million websites now use free SSL (BuiltWith data) — including big brands like Amazon and WordPress sub-services.
Free SSL is just as secure as paid versions. The only difference is how it’s verified.
1. One-Click Install via Hosting Panel (Best for Beginners)
Best for: Shared hosting or cloud server users (like Alibaba Cloud, Tencent Cloud, SiteGround)
Steps to Follow:
- Log in to your hosting provider’s dashboard and find the “SSL/TLS” or “Security” section
- Select “Free Certificate” and check the domains you want to secure (bulk selection supported)
- Click “Deploy” and wait 3–5 minutes for it to take effect automatically
Success Rate: 98% (Most major Chinese hosting providers already have compatible environments pre-installed)
Benefits: Zero tech skills needed, auto-renewal, failure rate is close to zero
Watch Out For:
- Some hosting providers limit the number of free certificates (e.g., West.cn only gives one)
- Make sure your domain is properly pointed to your current hosting IP
2. Let’s Encrypt + Certbot (Developer Recommended)
Best For: Self-hosted servers (like Nginx/Apache), managing multiple domains
Real Example: A blog with 100k+ daily users encrypted 100 subdomains in just 3 minutes using the command line
How-To Guide:
# Install Certbot (example: Ubuntu + Nginx)
sudo apt-get update
sudo apt-get install certbot python3-certbot-nginx

# Request and auto-configure certificate (replace yourdomain.com)
sudo certbot --nginx -d yourdomain.com -d www.yourdomain.com

# Enable auto-renewal (certs valid for 90 days)
sudo certbot renew --dry-run
Success Rate: 92% (depends on server environment setup)
Common Errors and Fixes:
Failed to connect to host for DVSNI challenge→ Check if ports 80/443 are open in your firewallThe server experienced an internal error→ DNS might not have propagated yet, wait for it to refresh
3. HTTPS via CDN Providers (Encryption + Speed Boost)
Supported Platforms: Cloudflare, Baidu Cloud Acceleration, Tencent Cloud CDN
Visual Guide (Using Cloudflare as an example):
- Create an account and add your domain
- In the “SSL/TLS” section, select “Flexible” mode (forces HTTPS site-wide)
- Enable “Always Use HTTPS” and “Automatic HTTPS Rewrites”
Activation Time: Instant (globally deployed nodes)
Main Advantages:
- No need to install a certificate on your origin server—CDN edge nodes handle encryption
- Works with old HTTP-based servers, perfect for fixing mixed content
- Free plan supports wildcard certificates (*.domain.com)
Solutions to Common Issues
| Limitation | Impact | Workaround |
|---|---|---|
| Short Validity | Let’s Encrypt is only valid for 90 days | Set up auto-renew with a cron job |
| Domain Ownership Only | Browser won’t show company name in address bar | Upgrade to OV certificate for business sites (starts at ¥300/year) |
| Single Domain Limit | Some hosts restrict how many domains you can bind | Use wildcard certificates (*.domain.com) |
Critical: Fixing “Mixed Content” Issues
“I installed an SSL certificate—why does it still say not secure?” — This is the #1 confusion for 78% of site owners after switching to HTTPS (Source: SSL Labs).
The root cause is mixed content—like a drop of ink in clear water, it breaks the encryption for the whole page.
1. Why Mixed Content Is a Big Deal
- Loss of User Trust: Even if your site is secure, browsers will still show a yellow triangle warning (upgraded to red in Chrome 94+)
- Broken Features: Some browsers block HTTP content entirely (images won’t load, JavaScript errors)
- SEO Penalty: Google marks pages with mixed content as “partially secure”, hurting rankings by about 11%–15% (based on Ahrefs research)
2. How to Spot the Problem in 3 Minutes
Method 1: Use Chrome DevTools
- Open the website and press F12 to access Developer Tools
- Switch to the Console panel and look for red error messages
- Click the link in the error message to jump directly to the Sources panel and locate the problematic code
Method 2: Use a third-party scanning tool
- Why No Padlock: Just enter a URL and it generates a list of mixed content in 5 seconds
- Jitbit SSL Check: Deep scans embedded CSS/JS links
Method 3: Do a global database search
For WordPress, Shopify, and similar platforms, you’ll need to check historical content stored in the database:
-- Find HTTP links (replace your_db_prefix with your actual table prefix)
SELECT * FROM your_db_prefix_posts
WHERE post_content LIKE '%http://%' AND post_status='publish';
3. Common sources of mixed content & how to fix them
| Issue Type | Percentage | Typical Scenario | Fix |
|---|---|---|---|
| Image hotlinking | 52% | Images in articles uploaded before 2018 | Download the image → Upload it to your own CDN |
| Third-party scripts | 23% | Chat widgets, ad network scripts | Ask the provider for HTTPS versions |
| Themes/plugins | 17% | Old themes using custom fonts or AJAX requests | Update the plugin or manually change http:// to // |
| Hardcoded URLs in database | 8% | Manually embedded video links in product pages | Batch replace URLs in the database (using a plugin is safer) |
4. Long-term strategy to prevent mixed content
- Protocol-relative URLs: Change
http://example.com/image.jpgto//example.com/image.jpg - Content Security Policy (CSP): Add this to your Nginx/Apache config:
add_header Content-Security-Policy "upgrade-insecure-requests"; Force redirect to HTTPS sitewide (code example)
“I’ve installed the SSL certificate, but why can users still access the HTTP version?” — This is the most critical vulnerability if you don’t fix mixed content properly.
A baby product e-commerce site once failed to configure forced redirects. As a result, 40% of their mobile users kept visiting HTTP pages through old links, triggering duplicate crawling on Google and causing a 30% drop in search rankings.
The key here is: catch all HTTP requests and redirect them permanently to HTTPS using 301 status code.
1. Universal code template (works for Apache/Nginx/IIS)
For Apache server (.htaccess file)
RewriteEngine On
# Force main domain to redirect
RewriteCond %{HTTPS} !=on
RewriteRule ^(.*)$ https://%{HTTP_HOST}%{REQUEST_URI} [L,R=301]
# Fix mixing www and non-www
RewriteCond %{HTTP_HOST} !^www\. [NC]
RewriteRule ^(.*)$ https://www.%{HTTP_HOST}%{REQUEST_URI} [L,R=301]
Applicable scenarios: Virtual hosting, WordPress, Joomla, and other PHP sites
Tips to avoid issues:
- Make sure the
mod_rewritemodule is enabled on your server - The file must be uploaded to your website’s root directory
- If the redirect doesn’t work, check whether there are multiple conflicting
.htaccessfiles
Nginx server (nginx.conf configuration snippet)
server {
    listen 80;
    server_name example.com www.example.com;
    # 301 redirect for entire site
    return 301 https://$server_name$request_uri;
    # Block sensitive HTTP methods
    if ($request_method !~ ^(GET|HEAD|POST)$ ) {
        return 444;
    }
}
Debugging tips:
- After making changes, run
nginx -tto test the syntax - Reload the config using:
nginx -s reload - Block unnecessary HTTP methods to help prevent data leaks
Windows IIS server (web.config rules)
<configuration>
  <system.webServer>
    <rewrite>
      <rules>
        <rule name="Force HTTPS" stopProcessing="true">
<match url="(.*)" />
<conditions>
  <add input="{HTTPS}" pattern="^OFF$" />
</conditions>
<action type="Redirect" url="https://{HTTP_HOST}/{R:1}" redirectType="Permanent" />
</rule>
</rules>
</rewrite>
</system.webServer>
</configuration>
Common Errors:
- IIS doesn’t have the “URL Rewrite” module installed → Official download link
- Chinese path encoding issue → Add
encode="false"to the rule
2. CMS-specific Solutions
For WordPress users
- Log into the admin dashboard → Settings → General
- Change the WordPress Address and Site Address from
http://tohttps:// - Install the plugin Really Simple SSL → One-click fix for mixed content in the database
For Shopify/Laravel and other frameworks
Force HTTPS in the environment variable file (.env):
APP_URL=https://www.example.com
FORCE_SSL=true
SESSION_SECURE_COOKIE=true
3. Special Handling for Mobile (AMP/WeChat Browser)
- AMP Page Redirect: Add
<meta http-equiv="refresh" content="0; url=https://new-url">in your AMP HTML - WeChat Caching Issue: Add a random parameter to the URL like
?v=2024to force HTTPS refresh
4. Test the Redirect Yourself
Browser Test:
- Visit
http://example.com→ The address bar should automatically switch tohttps:// - Check if the lock icon after redirect is green
Command Line Verification:
curl -I http://example.com
# A correct response should include:
# HTTP/1.1 301 Moved Permanently
# Location: https://example.com
Online Tools:
Error Warning:
Misconfiguration → Infinite redirect loop (ERR_TOO_MANY_REDIRECTS)
Common causes:
1. CDN is also forcing HTTPS redirect (conflicts with server rules)
2. Load balancer doesn’t pass the protocol header correctly
Fix:
Add this to your Nginx config:
proxy_set_header X-Forwarded-Proto $scheme;
SEO-Friendly Redirect Tips:
- Use a 301 redirect site-wide (permanent redirect), so all link equity is passed
- Avoid chained redirects (e.g., http→http://www→https); keep it to 1 hop max
- Submit your HTTPS sitemap to Google Search Console
Since 2018, Google has gradually made HTTPS a ranking factor. Unsecured sites lose an average of 12%-15% of their traffic each year, and this loss keeps growing as user awareness around web security increases.